Author name: Steven Thomson

Covering Glasgow, Steven Thomson is your local specialist for tile cleaning, stone cleaning, grout cleaning and tile, stone and grout sealing covering the restoration of all types of stone and tiled flooring including Ceramic, Limestone, Marble, Porcelain, Quarry, Sandstone, Slate, Terracotta, Terrazzo, Travertine and Victorian tile

Travertine Tiled Kitchen Floor Renovation Cumbernauld

Travertine Tiled Floor Restoration in Cumbernauld Kitchen and Utility

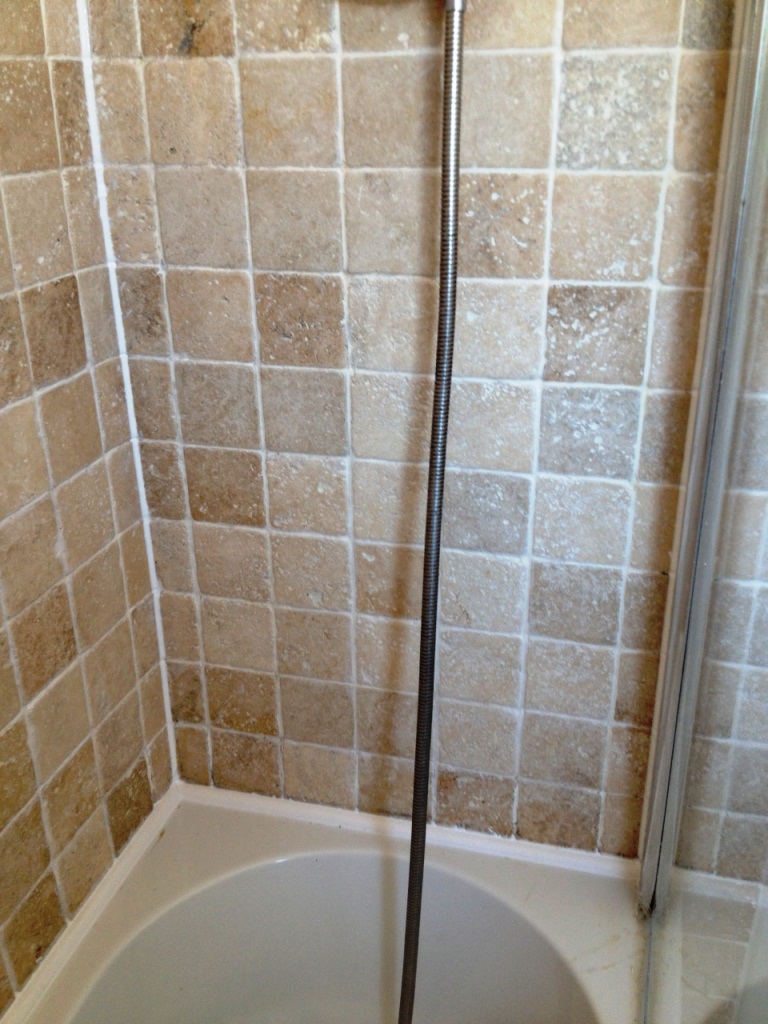
We were contacted by a homeowner from the town of Cumbernauld in Glasgow about cleaning their Travertine tiled floor. The travertine tiles had been laid throughout the kitchen and utility room some years prior and since that time had become dull and unappealing. Kitchens are a high traffic area and more prone to staining than most rooms, in this case the grout had become very discoloured.

Travertine Tiled Floor Before Cleaning Polishing Cumbernauld

I visited the property to survey the floor and check the extent of the problems. I could see that the original sealer and polish had basically been worn down with use over the years and to resolve it would need deep cleaning including the grout, stone polishing, and re-sealing. Having worked out a solution I explained the plan to my client and reassured him that the floor could be renovated, and we would soon have it looking good again. I gave them a price which was accepted and a date agreed for our return to do the work.

Travertine Tiled Floor Before Cleaning Polishing Cumbernauld

Cleaning a Travertine Tiled Kitchen and Utility Floor

This work was carried out over 2 days, on the first day we deep cleaned the stone and grout using Tile Doctor Pro-Clean which is a versatile tile and grout cleaning product. This product was left to dwell for a short while allowing it to soak in and get to work on the ingrained dirt. It was then agitated using the rotary floor cleaner fitted with a black scrubbing pad. Afterwards the dirt is then rinsed away with water and the soiling extracted using a wet vacuum.

Travertine Tiled Floor During Cleaning Polishing Cumbernauld

Next, a 400-grit diamond burnishing pad was applied to start the honing and polishing and is the first step in restoring the polished appearance of the Travertine. We worked our way through the 400, 800, 1500 then 3000 grit burnishing pads that day, slowly cleaning and re-building the polish. In between each pad the soiling was extracted, and grout scrubbed reapplying Tile Doctor Pro-Clean as required to remove any residues left by the pads. The floor was then left overnight to dry ready for applying the seal the following day.

Sealing a Travertine Tiled Kitchen and Utility Floor

Returning the next day work began by checking the moisture readings of the floor using a damp meter. The readings were good and it confirmed the floor was dry and ready for sealing. If the floor proved to be damp then the seal would fail to cure properly.

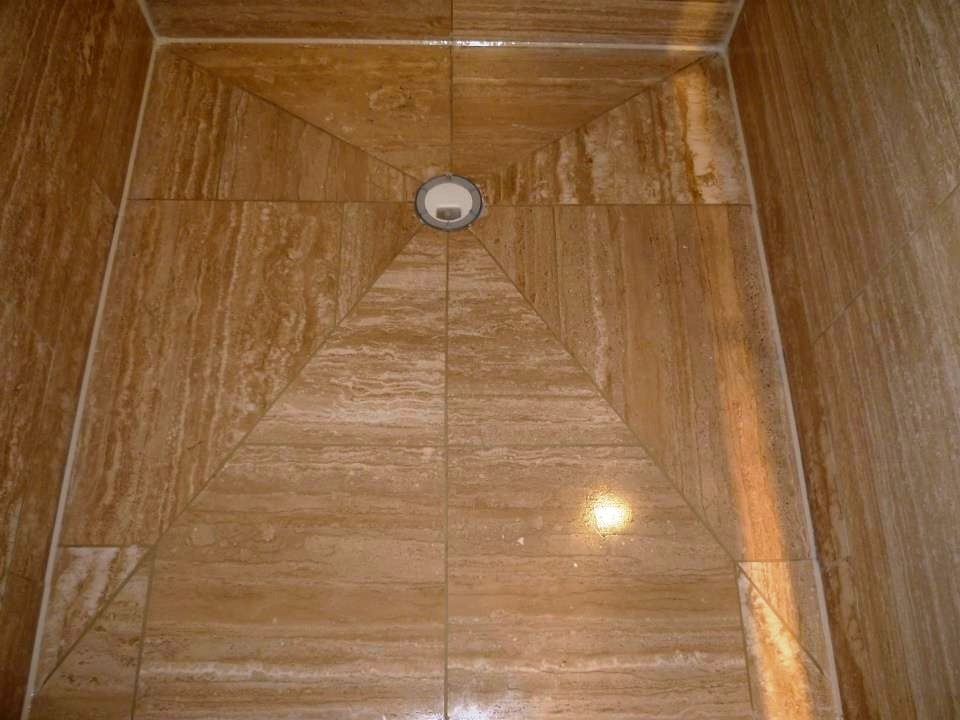
To seal the floor, we had agreed on the use of Tile Doctor Colour Grow which is an impregnating sealer that contains a colour enhancer that will provide the stone floor with a lovely semi matt finish. The first coat of sealer was still visible after 10-15 minutes so the excess was buffed off with a White pad and then left to cure for an hour. We then went over the floor with the White buffing pad again just to bring up the shine on the Travertine. Sometimes it is necessary to apply several coats of the sealer, but this floor had taken it well, so this was not needed.

Travertine Tiled Floor Ater Cleaning Polishing Cumbernauld

One done the floor looked fantastic, it has a lovely light sheen and the natural brown tones of the floor looked fabulous. The client was over the moon with the work we had carried out.

Travertine Tiled Floor Ater Cleaning Polishing Cumbernauld

Before leaving I took time to discuss aftercare cleaning which for a polished stone floor like this, I recommend the use of Tile Doctor Stone Soap which is a gentle cleaning product that won’t impact the sealer and will maintain the patina.


Professional Restoration of a Travertine Tiled Kitchen and Utility in Glasgow

Travertine Tiled Floor Restoration in Cumbernauld Kitchen and Utility Read More »

Victorian Hallway Tiles Before After Restoration Glasgow West End

Victorian Hallway Tiles Fully Restored in Glasgow West End

The restoration of this Victorian Tiled hallway floor at a property in Glasgow’s West End proved to be quite a challenge. It had seen a long life and over that time it had numerous so called repair work carried out on it which basically resulted in bits of problematic floor being ripped out and back filled with concrete.

Victorian Tiled Hallway Before Full Restoration Glasgow West End

The current owner fully appreciated the value a fully restored period feature like an original tiled floor can add to a property so we were asked to pop round and provide a quote. Having restored numerous floors in the area I was happy to take on the job and provide a quote for the work. With the quote accepted and a date agreed I set about sourcing replacement tiles to match the existing.

Victorian Tiled Hallway Before Restoration Glasgow West End

Repairing a Victorian Tiled Hallway Floor

The first job was to lift all the tiles that were damaged or loose and move them to one side. This was followed by carefully knocking out all the areas of concrete back fill and screed from the original repairs. With the rubble cleared those areas were then levelled off with a mixture of cement board and self-levelling compound until the floor was level with the base of the original tiles.

Victorian Tiled Hallway During Restoration Glasgow West End Victorian Tiled Hallway During Restoration Glasgow West End

While the repairs to the subfloor were setting the focus work moved on to salvaging as many of the original tiles as possible by grinding down the sides and backs to remove the old adhesive and cement. Once the tiles were cleaned and the sub floor had dried it was time to lay the tiles to match the original pattern. Many of the original tiles were unusable so a mixture of original and new reproduction Victorian tiles were used. Most of the tiles had to be hand cut down to size to fit.

Victorian Tiled Hallway During Restoration Glasgow West End Victorian Tiled Hallway During Restoration Glasgow West End

The floor was then left to set and then re-grouted before moving on to the next step of restorative cleaning and sealing.

Restorative Cleaning and Sealing of an Original Victorian Hallway Floor

Old Victorian floors like this one do not have a damp proof membrane are as such are very susceptible to Efflorescent salt issues, so because of this I opted to go with a low moisture cleaning method.

This involved cleaned the tiles using a Tile Doctor Acid Gel which was worked in initially with a 100-grit diamond pad and then a 200-grit diamond pads fitted to a weighted rotary bonnet machine. This was carried out several times with all the slurry extracted using a wet vacuum. The advantages of Acid Gel is that an acidic cleaner will neutralise and alkaline salt, being a gel its very easy to control and finally its good at removing grout smears left over from tiling.

After a final inspection the floor was left to dry out overnight with the help of a fan to assist the drying before we could return to seal the tiles.

Sealing a Victorian Tiled Hallway Floor

I returned the following day to seal the floor checking first that it had dried using a damp meter. Once I was satisfied, three coats of Tile Doctor Colour Grow were applied to the tiles to enhance their appearance and protect then going forward.

Victorian Tiled Hallway During Sealing Glasgow West End

I chose Colour Grow mainly because it’s a fully breathable sealer that will allow moisture to rise through the tile and evaporate at the surface. Use of a non-breathable sealer can lead to moisture becoming trapped under the floor where it could spread into the walls leading to rising damp.

Victorian Tiled Hallway After Full Restoration Glasgow West End Victorian Tiled Hallway After Full Restoration Glasgow West End

The hallway was completely transformed by the time we had finished and as you can imagine our client was more than happy. So much so they even recommended us for another job and went to the extent of inviting them round to view the work.

Victorian Tiled Hallway After Full Restoration Glasgow West End


Professional Restoration of a Victorian Tiled Hallway in Glasgow

Victorian Hallway Tiles Fully Restored in Glasgow West End Read More »

Victorian Tiled Hallway Floor Renovated in Johnstone

Dirty Victorian Hallway Floor Tiles Renovated in Johnstone

This is another Victorian hallway floor we deep cleaned in Johnstone which is located to West of Paisley. Before quoting I visited the property to survey the Victorian tiles and ensure I had a complete idea of what would be needed to fully renovate floor.

Victorian Tiled Floor Before Cleaning Johnstone

After inspecting the floor, I could see there were no surprises such as loose or cracked tiles that would need replacing and that the main issue was it was just incredibly dirty. All that it needed would be deep cleaning including stripping of any remaining sealer, then cleaning and ultimately sealing.

This is a typical Tile Doctor job for us to carry out and having worked on many Victorian floors before I was very confident of a great result. The client was happy to go ahead with the quotation and we arranged to return a few weeks later.

Cleaning a Victorian Tiled Hallway Floor

The floor was given a pre spray of Tile Doctor Remove and Go diluted 50:50 with water and then left to soak in for10 minutes to give it time to break down the dirt and any previous coatings that may have been present on the floor. Then the floor was scrubbed using a rotary bonnet machine fitted with a silicon carbide brush. This is an effective brush that in combination with the Remove and Go released a lot from the pores of the tile to the surface where it could be extracted with a wet vacuum. The floor was dirtier than anticipated and the process was carried out three times to ensure floor was as clean as possible.

Once the chemicals had done as much as they could the Victorian tiles were resurfaced using Tile Doctor 100 and 200 grit milling pads that remove stubborn ingrained dirt and staining. This process was carried out twice rinsing with water and extracted the soiling with a wet vacuum afterwards.

Last process was to give the tiles a mild Acid wash using Tile Doctor Grout Clean-up. This was scrubbed in using soft brushes fitted to the bonnet machine and then extracted as before. This process further cleans up the tile and will counter any efflorescent salts that can build up in floors of this age which won’t had a modern damp proof membrane in place.

The floor was left to dry out for a few days with a fan left in place to speed up the drying times. The floor looked so much cleaner than when we started, and my client was already pleased with the results.

Sealing a Victorian Tiled Hallway Floor

On my return the I took a few moisture readings with a damp meter to check it was dry enough to accept a sealer. We don’t recommend applying a sealer to a damp floor as from experience the results can be inconsistent so always best to check first.

The meter readings were fine, so I started applying the sealer, which for this floor Tile Doctor Colour Grow was chosen. Three coats were applied to fully protect the floor and bring the colours back after being cut back with the milling pads. This sealer works by soaking into the pores of the tile, occupying the pores, and thereby preventing dirt from becoming ingrained there going forwart. As the name suggest it’s a colour enhancing product that is also fully breathable which is important for floors with no damp proof membrane.

Victorian Tiled Floor After Cleaning Johnstone

For aftercare cleaning I recommended the use of Tile Doctor Neutral Cleaner which is a mild pH neutral tile cleaner that is gentle enough for daily use and will ensure that the newly applied seal is not compromised and kept looking good, especially in such a high traffic area.


Professional Restoration of a Victorian Tiled Hallway in Glasgow

Dirty Victorian Hallway Floor Tiles Renovated in Johnstone Read More »

Damaged Victorian Hallway Floor Fully Restored in Glasgow West End

Badly Damaged Victorian Tiled Hallway Floor Fully Restored in Glasgow West End

The client had lifted the old floor in the hallway of their property in Glasgow’s West End and discovered original Victorian tiles underneath. The Victorian tiles had however suffered over the years and parts of the floor had been destroyed during the installation of new heating and electrics some years prior. Following the installation, the damage had just been back filled with cement to provide a level surface and then covered.

Victorian Tiled Hallway Floor Before Restoration Glasgow West End

I visited the property to survey the hallway tiles and work out a plan for restoring them. The cement would need removing, and new replacement tiles would be required. Fortunately, these tiles are still popular today and there are several specialist suppliers in the UK where I can find a good match. The floor would then need deep cleaning and sealing to complete the restoration. I provided the clients with a price for the work, they were happy to accept my quote and we arranged a convenient time to return and carry the work out.

Victorian Tiled Hallway Floor Before Restoration Glasgow West End

Repairing a Victorian Tiled Hallway Floor in Glasow

The first job was to carefully knock out the cement backfill using a breaker and hammer/chisel for the more delicate bits to ensure not to damage the cables and pipes underneath. The rubble was removed, and the areas backfilled with a self-levelling compound at a height to provide a new base to lay the replacement tiles.

Victorian Tiled Hallway Floor During Restoration Glasgow West End Victorian Tiled Hallway Floor During Restoration Glasgow West End

Once the self-levelling compound had set the replacement tiles were laid which were about 250 in number combined with a mixture of spare original tiles the client had found in a box.

Deep Cleaning a Victorian Tiled Hallway Floor in Glasgow

The full floor was then cleaned several times using a strong dilution of Tile Doctor Remove and Go worked in with 100 grit and 200 grit milling pads fitted to a rotary buffer. Handheld diamond burnishing blocks were also used along the edges and harder to clean areas that are a struggle to reach with the buffer. The floor was then rinsed with water and the soil removed with a wet vacuum.

The next step was to give the floor an acid rinse using a dilution of another Tile Doctor product called Grout Clean Up. Old Victorian floors tend to suffer from efflorescence issues which is where alkaline salts from the foundation are deposited on the surface. Modern floors have a damp proof membrane to prevent this however washing the floor with an acid-based product neutralises the alkaline salts and resolves the problem.

Afterwards we regrouted the full floor in order to help stabilise the other tiles which weren’t replaced or fixed by us and also fill any gaps etc.

Sealing a Victorian Tiled Hallway Floor in Glasgow

The floor was left to dry for a week before returning and returning to apply a sealer. A lot of water was used in the cleaning process and the floor needs to be dry before applying a sealer. Sealing a damp floor will give you inconsistent results so it’s worth the wait.

To seal this floor a chouse Tile Doctor Colour Grow which ticks a lot of boxes for an old floor like this one. First, it’s a matt finish sealer which matches the requirements of the owner; second it contains a colour enhancer that improves colour and third it’s fully breathable so moisture can rise though the tiles and evaporate at the surface. Allowing a floor to breath as otherwise the moisture can build up under the floor and eventually reach out to the walls where it can result in rising damp.

Three coats of Colour Grow were applied, allowing each coat to dry before applying the next. This sealer works by soaking into the pores of the tile, occupying the space, and thereby preventing dirt from becoming ingrained there. This makes the floor much easier to clean and adds durable protection which will last for years to come.

Victorian Tiled Hallway Floor After Restoration Glasgow West End Victorian Tiled Hallway Floor After Restoration Glasgow West End

As you can see from the photos the Victorian tiled hallway as restored back to its original condition and my client was over the moon. Finally, I like to recommend the use of Tile Doctor Neutral Tile Cleaner to keep the floor looking in great condition, its pH neutral so will not damage the newly applied seal.

Victorian Tiled Hallway Floor After Restoration Glasgow West End


Professional Restoration of a Victorian Tiled Hallway in Glasgow

Badly Damaged Victorian Tiled Hallway Floor Fully Restored in Glasgow West End Read More »

Victorian Tiled Floor Restoration Glasgow West End

Original Victorian Tiled Hallway Repaired and Restored in Glasgow’s West End

We recently carried out renovation work to a Victorian Tiled Hallway floor at a period property in Glasgow’s West End. I went over to the property first to survey the floor and see its condition before quoting for the job. The floor was in quite a state and had pretty much collapsed around the door threshold. I suspect this was due to an old settlement issue.

Having put up with the condition of the floor for some time the owner had decided it was time to have something done about it. As well as a deep clean repair work would need to be done first; this would involve sourcing some replacement tiles which is not usually a problem as there are various suppliers I have sourced similar tiles from in the past.

Confident of achieving a good result for the customer I worked out a quote for the restoration, which was accepted, and a date arranged to complete the work which would take three days.

Victorian Floor During Restoration Glasgows West End

Cleaning and Repairing a Victorian Tiled Hallway Floor

The first task was to remove the damaged subfloor around the door, carefully removing the old Victorian tiles for reuse however most were cracked and broken. What was left of the old subfloor was then removed and backfilled with a quick drying cement screed to a level ready for tiling.

Victorian Floor During Restoration Glasgows West End

I had managed to rescue a few of the old Victorian tiles however there would not be enough to complete the floor however I was able to find matching replacements that would blend in nicely with the original pattern. The replacements were fixed into place with a flexible adhesive in case there was any further movement in the floor.

Victorian Floor During Restoration Glasgows West End Victorian Floor During Restoration Glasgows West End

There were several other areas that needed attention and were fixed down, the whole section was then re-grouted and left to set for a few days.

On our return the floor was deep cleaned using a strong dilution of Tile Doctor Remove and Go which was scrubbed in with a 200-grit diamond pad fitted to a rotary floor buffer. The floor was then rinsed with water and the soil extracted with a wet vacuum. I repeated the process in a couple of areas that were particularly stubborn with ingrained dirt. The floor was left to dry out overnight.

Sealing a Victorian Tiled Hallway Floor

I returned the following day to complete the restoration starting by checking the moisture level in the floor with a damp meter. Floors of this age don’t have a damp proof membrane to prevent moisture rising through the sub floor so can take longer to dry out. Also, for best results sealers need to be applied to a dry tile so I always like to check first.

The readings were within tolerance, so I began sealing the floor with the first of two coats of Tile Doctor Colour Grow. This sealer was chosen as it’s a fully breathable impregnating sealer which is very hardwearing, perfect for high traffic areas such as hallways. It also enhances the natural colour of the floor without making it too shiny. The breathable nature of the sealant will ensure it copes well with moisture rising through the tiles and its colour enhancement properties really helped blend the old tiles in with the new.

Victorian Floor After Restoration Glasgows West End Victorian Floor After Restoration Glasgows West End

The repair, deep clean and fresh seal transformed the Victorian Tiled floor which given its age exceeded the expectations of my customer who was very happy. For maintenance cleaning I suggested Tile Doctor Neutral Tile Cleaner which is a gentle tile cleaning product designed for use with sealed floors. I always recommend this product as many tile cleaners are very strong and you can end up stripping the sealer off if you’re not careful.


Professional Restoration of a Victorian Tiled Hallway in Glasgow

Original Victorian Tiled Hallway Repaired and Restored in Glasgow’s West End Read More »

Victorian Hallway Floor Restoration Newton Mearns

Victorian Tiled Hallway Floor Fully Restored in Newton Mearns, Glasgow

This old classic Victorian tiled hallway at a property in Newton Mearns, south of Glasgow, had seen a lot of wear over the years leading to a general degradation. Some of the major problems including loose and broken tiles and one area in particular under a radiator was so bad a previous owner had back filled it with cement instead of having it repaired.

I suspect the house had been reconfigured and central heating added at some point in its history, and this will have been when the damage was done. The current owner was aware of the value that original features can have on a property so decided it was time to have the whole floor restored.

Having worked on numerous Victorian floor restorations previously I knew the floor could be put back to its original condition if not better, so I was more than happy to take on work. Having visited the property and provided a quotation for the work I’m please to say we were intrusted to go ahead with the restoration.

Repairing and Cleaning a Victorian Tiled Hallway Floor

On day one the work started by carefully lifting, grinding and fixing back down the original tiles, this included repairing areas that had been back filled with concrete using originals recovered from another part of the floor that was no longer required.

Victorian Hallway Floor During Restoration Newton Mearns Victorian Hallway Floor During Restoration Newton Mearns

Once the adhesive had set the tiles were grouted and the floor left for a few days.

On our return the floor was given a deep clean using a strong dilution of Tile Doctor Remove and Go worked in with 100 and 200 grit diamond pads fitted to a rotary floor buffer. The soil generated was rinsed off and extracted using a wet vacuum. This process removes any old sealants and deep-seated dirt from the old tiles. This process was repeated, and some tiles needed to be spot treated by hand before they met the high standard I was looking to achieve.

The next step was to improve the tiles further by giving the floor an Acid Rinse using Tile Doctor Grout Clean Up. This final part of the cleaning process further cleans up the tiles by removing surface grout that can detract from the appearance of the tile and mineral salts. This is a common issue with floors of this age which don’t have a damp proof membrane installed under the floor and can lead to white salt deposits appearing as the tile dries out, a process called Efflorescence.

Victorian Hallway Floor After Restoration Newton Mearns

Sealing a Victorian Tiled Hallway Floor

The floor was then left for a week so it could fully dry out before returning to seal the tiles. Its important that the tiles are dry before sealing otherwise you risk a patchy appearance. Due to the fact this floor had no damp proof membrane I chose to use Tile Doctor Colour Grow which being fully a breathable will could cope with any moisture rising through the floor. Three to four coats of Colour Grow were applied which as its name suggests also intensifies the colours in the tile as well as adding the high level of protection that a busy hallway floor needs.

Victorian Hallway Floor After Restoration Newton Mearns

Colour Grow is an impregnating sealer that penetrates into the tile occupying its tiny pores and thereby preventing dirt from becoming ingrained. You can always tell the sealer is working as it will repel liquids which will then form beads on the surface of the tile.

Victorian Hallway Floor After Restoration Newton Mearns

The floor looked amazing once finished and lifted the appeal of the whole property. The client was very satisfied with the work we had carried out and before leaving I made a point to recommend the use of Tile Doctor Neutral Tile Cleaner to keep the floor looking in tip top condition. This product is pH neutral and will ensure that the newly applied seal is not compromised which is a problem when using stronger off the shelf cleaning products.

Victorian Hallway Floor After Restoration Newton Mearns


Professional Restoration of a Victorian Tiled Hallway in Glasgow

Victorian Tiled Hallway Floor Fully Restored in Newton Mearns, Glasgow Read More »

Victorian Tiled Hallway Floor Before After Restoration Glasgow West End

Carpet Covered Victorian Hallway Tiles Restored in Glasgow West End

I thought you might be interested in these pictures of a tile restoration that we carried out in the hallway of a victorian property in the West End of Glasgow. Glasgow is actually the most populated city in Scotland and the third biggest by population in the whole of the UK so naturally a busy location for us.

The floor had been previously covered in carpet and as a result was stained with adhesive and paint splashes. We popped in to do a site visit, so we could survey the floor and see for ourselves the condition of the floor. Although not in great shape, I was happy that the overall floor was in good physical condition and could be restored with the help the products and methods.

Victorian Hallway Floor Before Cleaning Glasgow West End

I discussed with the client the process involved and the costs to put it right. They were happy to accept my quote and we booked the job in for later in the month. The job would take two days to complete, one day to clean and a further day to seal the floor.

Victorian Hallway Floor Before Cleaning Glasgow West End

Cleaning a Victorian Tiled Hallway Floor

The first job was to clear the floor of the wooden carpet gripper by carefully chipping it off the floor. This took a bit of time and we had to be careful not to damage the floor further.

Next, we started on deep cleaning the floor by applying Tile Doctor Oxy-Gel. This is a strong alkaline based cleaner and degreaser in gel form, its great for when a long dwell time is required to break down dirt, grime, acrylic sealers, stains and oil-based products and waxes.

We left the Oxy-Gel to dwell for twenty to thirty minutes to ensure it got to work on breaking down the layers. It was then worked into the tile using a black scrubbing pad fitted to a rotary machine with the slurry rinsed off the floor and extracted with a wet vacuum. This process was carried out a few times to get the floor as clean as possible could before we gave a final scrub and rinse with Tile Doctor Acid Gel to combat any efflorescence issues that can occur on these old floors that do not have a damp proof membrane.

Sealing a Victorian Tiled Hallway Floor

I returned the following day to seal the floor checking first that it had dried using a damp meter. Once I was satisfied, four coats of Tile Doctor Seal and Go Extra were applied to the tiles to give the sheen finish asked for by the client. This process takes longer that you might think as you have to wait for the first coat to dry before applying the next and naturally this can vary depending on the conditions.

I chose Seal and Go Extra as these Victorian properties were built before the invention of damp-proof membranes so you need to use a fully breathable sealer that will allow dampness to rise through the tile and evaporate. Use of a non-breathable sealer can lead to damp becoming trapped under the floor which can spread into the walls leading to rising damp. The sealer will protect the tiles and make it much easier to clean going forward, additionally it enhances the appearance of the tile leaving a sheen finish which allows the vivid colours to shine through.

Victorian Hallway Floor After Sealing Glasgow West End

The client was very happy with the floor and quite amazed with the before and after shots, they had not expected the results to be as good. They would now be able to easily keep the floor clean and looking good for any visitors.

Victorian Hallway Floor After Cleaning Glasgow West End


Professional Restoration of a Victorian Tiled Hallway in Glasgow

Carpet Covered Victorian Hallway Tiles Restored in Glasgow West End Read More »

Flagstone Floor Before After Restoration Glasgow

Stained Flagstone Floor Resurfaced and Sealed in Glasgow West End

These photographs are of a Flagstone floor tiled floor we stripped and sealed at a house in the West End of Glasgow. If you’re not familiar with Glasgow that well then, it’s worth knowing that the West End of Glasgow is the more favoured end and contains the best hotels and attractions, where as the East End is traditionally the industrial part.

Flagstone Floor Glasgow West End Before Restoration

The flagstone floor was very dirty and had numerous marks and staining. Interestingly we were not the first company to work on this floor, in fact before we got the call another company had already tried to carry out the work and made a mess of the floor followed by giving up and walking away from the job.

Flagstone Floor Glasgow West End Before Restoration

We clearly had our hands full however we have done this sort of work before and being part of the Tile Doctor network means we have the resources and experience of a large organisation behind us, so we were not overly concerned.

Cleaning a Flagstone Floor

Working in sections we stripped the floor using a strong solution of Tile Doctor Pro-Clean mixed 50:50 with Remove and Go. This creates a powerful coatings stripper and tile cleaner that can safely shift coverings from tiles. The solution was left to dwell before going over the floor with a very coarse 100 and then 200-grit diamond milling pad which worked well with the cleaning products to restore the look of the flagstones. Naturally it wasn’t as easy as it sounds, the process needed to be repeated several times to get the previous sealer removed and the stone surface restored.

Once satisfied the Flagstone surface was restored, we then gave the floor a couple of cleans using Tile Doctor Pro-Clean to remove any remaining soil and to get the grout lines clean. Then to neutralise the pH level of the floor prior to sealing it was rinsed with tile doctor neutral tile cleaner.

The floor was then left to dry out overnight assisted by a couple of turbo air movers and a heater that we left behind.

Sealing Flagstone Flooring

The next day we returned to seal the floor first checking the floor had dried. Fortunately, the equipment we left behind had done their job and so we could proceed with the application of the sealer. The sealer we chose for this installation was Tile Doctor Seal and Go which will protect the stone and allow for easy cleaning and maintenance for customer.

Flagstone Floor Glasgow West End After Restoration

One finished the floor looked much cleaner, the stains had gone, and the sealer added a nice subtle polished appearance to the flagstones. The owner of the property was very happy with transformation we had achieved and much relieved that the floor could be restored.

Flagstone Floor Glasgow West End After Restoration


Professional Renovation of a Flagstone Floor in Glasgow

Stained Flagstone Floor Resurfaced and Sealed in Glasgow West End Read More »

Small Victorian Vestibule Before and After Restoration

Victorian Tiled Vestibule Rebuilt and Restored in Glasgow West End

Vestibules (aka entranceways) are not that commonly found in new build houses, but they certainly were a popular architectural feature back in the Victorian period. Many of the Victorian properties which are still in use today still contain their original geometric patterned encaustic cement tiles. These tiles can be very beautiful and colourful – that is if they’re kept looking that way with routine cleaning and maintenance.

I recently visited a Victorian property in Glasgow’s West End to carry out the restoration of one of these tiled floor vestibules. This Victorian tiled vestibule was in truly awful condition. Not only were the tiles caked in years’ worth of muck and paint stains – some of the tiles were completely missing or, at the very least, loose and damaged.

Small Victorian Vestibule Before Restoration
I could see that restoring these tiles back to their peak condition would require several days of work however the owner has keen to get the work done so we set a date for my return to complete the work.

Cleaning and Rebuilding Damaged Victorian Entranceway Tiles

On the first day of work, our priority was to undertake a much needed deep clean of the tiles. This was done using Tile Doctor Pro Clean combined with Tile Doctor Remove and Go. Pro Clean is an alkaline-based cleaner specialised for heavy soil removal, while Remove and Go is formulated to strip away any old sealers, as well as the paint splashes that were very prominent on these tiles.

Small Victorian Vestibule During Restoration
Th combined cleaning solution was left to dwell for a short period of time on the surface of the floor before being scrubbed into the tiles to cut through the thick muck. A steaming machine was used to ensure the products penetrated deep into the pores of the stone to extract ingrained dirt.

During the cleaning process, we could identify which tiles were loose, damaged and missing. These tiles were carefully removed and put to one side. Once the clean was completed the tiles were left to dry off overnight.

The next the floor had dried, and we started to rebuild the floor. This involved installing and grouting new tiles that we had previously sourced for the job to match as closely possible with the original pattern of the floor.

Next, the newly installed tiles were left to set, before we gave the floor an acid rinse using Tile Doctor Grout Clean-Up. This product removed any grout haze from the tiles and will neutralise any efflorescence salts that may rise up through the tiles as they dry. This issue can be quite a problem with older properties which don’t have a damp proof course installed.

Sealing a Victorian Tiled Vestibule

Once again, we left the floor to dry out completely overnight, this is especially important when applying a sealer to a tile as sealing damp tiles will lead to issues. We recommend the use of a damp meter at this point to ensure the tiles are indeed dry before sealing.

To seal the floor, we used three coats of Tile Doctor Colour Grow, which is ideal for these uniquely patterned Victorian tiles as it intensifies the different colours in the stone, while also offering a natural-look matte finish. Of course, the sealer will also provide the tiles with lasting protection again dirt and muck and is also breathable so any damp rising up through from the sub floor will be able to evaporate.

Photos really do speak louder than words in this case, as the restoration achieve some fantastic results. Take a look at the photo below – I’m sure you’ll agree the difference is incredible. Certainly, our very happy customer seemed to think so!

Small Victorian Vestibule After Restoration
 

Professional Restoration of a Small Victorian Tiled Vestibule in Glasgow

Victorian Tiled Vestibule Rebuilt and Restored in Glasgow West End Read More »

Smoke Damanged Shower Tiles Before and After Restoration Ayr

Smoke Damaged Shower Cubicle Renovation in Ayr

Below are a few photos of a smoke damaged shower cubicle where we were asked by an insurance company to restore the tiles following a house fire in the town of Ayr. Just south of Prestwick airport on the South West Coast of Scotland, Ayr is built along the river of the same name and dates all the way back to 1205.

You can see from the photograph below that the tiles how bad that smoke damage was. When we arrived work had already started to strip out the electric shower and screen removing a strip of tiles in the process. It was also clear that someone had also attempted to clean the ceramic tile and grout but had given up after realising how much work was needed.

Smoke Damanged Shower Tiles Before Restoration Ayr

Cleaning Smoke Damaged Tile and Grout

We had to give the tile and grout several deep cleans using a strong dilution of Tile Doctor Pro-Clean which was sprayed on, left to dwell for a while and then scrubbed in by hand. On reflection Oxy-Gel might have been a better product for the job as it has the same active ingredients but comes in a gel form which allows it to stick to vertical surfaces resulting in longer dwell times.

We managed to successfully remove all the smoke and soot from the surface of the tile and grout with this process. However although the grout was now clean I could see it was going to need more work if it was going to pass muster.

Smoke Damanged Shower Tiles During Restoration Ayr

Grout Colouring

To overcome the grout issue I decided to colour it with a White grout colourant; this was a perfect time to apply the colourant as the Pro-Clean had prepared the grout joints and would make a good bond with the colourant. I used three coats of white grout colourant in the end, each one applied by hand with a small brush. The colourant is basically painted on top of the existing grout and any excess wiped off the adjacent tile before it dries. It’s an epoxy based formula that becomes a long-lasting barrier protecting the grout and making it much easier to clean.

Following this I cleaned the tiles down again, this time with Neutral Tile Cleaner and then turned my attention to the stained silicone sealant around the base of the shower tray which was cut out and replaced with fresh new white silicone.

I gave the shower tray a clean as well and the final result was a very fresh looking shower cubicle which will soon back in action once the other trades finish their installations.

Smoke Damanged Shower Tiles After Restoration Ayr
 

Ceramic Tiled Shower Cubicle Restored Following Fire in Ayrshire

Smoke Damaged Shower Cubicle Renovation in Ayr Read More »

Changing Grout Colour in Greenock Bathroom Before and After

Changing Ceramic Tiled Grout Colour in a Greenock Bathroom

This bathtub with shower over was at a house in the old shipbuilding port of Greenock within the historic county of Renfrewshire. I’m not sure you can appreciate it from the before photograph below, but the grout was white and was starting to discolour. The owner of the house didn’t want it to get any worse and asked us for help.

Changing Grout Colour in Greenock Bathroom Before

Preparing the Grout

We discussed the options and the benefits of applying a grout colour which would not only change the colour but also add a layer of protection over the grout which would be much easier to keep clean going forward.

With the decision made we set about cleaning the grout first with a Grout Colourant Pre-Treater that cleans and etches the grout resulting in a better bond with the grout colourant. This was followed by rinsing the grout with water to remove any dirt and remove the traces of pre-treater before drying it off with a heat gun ready for the next step.

Grout Colouring

The customer had decided on a Chocolate grout colour, so it would blend in with the brown tiles more effectively. So, once the grout has dried two coats of Tile Doctor Grout Colourant were applied over the grout with a small brush. This product is basically painted on top of the existing grout any any excess wiped off the adjacent tile before it dries. It’s an epoxy based formula that becomes a long-lasting barrier protecting the grout and as I mention before making it much easier to clean.

Last step before leaving was to strip out the stained silicone sealant between the top of the bath and tile and replaced with fresh new white silicone to match with the white bathroom suite.

Changing Grout Colour in Greenock Bathroom After
The job only took a day to complete and the owner was very pleased with the way the tiles now looked.

Applying Chocolate Grout Colour to Bathroom Tiles Inverclyde

Changing Ceramic Tiled Grout Colour in a Greenock Bathroom Read More »

Terrazzo Steps Before and After Cleaning and Sealing in Glasgow

External Terrazzo Tile Steps Refinished in Glasgow

The photographs below are from a set of Terrazzo steps outside a house in Glasgow which had completely lost their colour after being subject to years of weather staining and believe me we see all sorts of weather up here in Scotland. The owner of the house wanted them restoring back to their natural state but naturally concerned about safety didn’t want them shiny or slippy in anyway.

Terrazzo Steps Before Cleaning and Sealing in Glasgow

Cleaning Terrazzo Steps

I could see tackling the different surfaces of the stone stairs would be tricky so rather than opt for a cleaning product I decided to use a set of diamond encrusted burnishing pad fitted to a handheld flex machine.

I started with the very coarse 50 grit pad lubricating along the way with a little water and moved up through the medium and fine pad until the job was finished. Now normally when working on stone this is followed up with the application of a very fine pad to restore a polished appearance but clearly in this case that would not be necessary. In between the application of each pad the steps were rinsed with water to remove the slurry generated in the burnishing process.

One complete I left them to dry out for a few days; fortunately I had timed my visit within a warm weather window so I was confident they should be dry when I returned.

Sealing Terrazzo Steps

I returned a few days later and after checking the stone had indeed dried out I sealed the Terrazzo with three coats of Tile Doctor Colour Grow which is a breathable impregnating sealer suitable for external application. Being an impregnator it protects the stone from within by occupying the pores in the stone where dirt might otherwise become ingrained, it also enhances the natural colours in the stone and as you can see from the photograph below the steps now look much pinker.

Terrazzo Steps After Cleaning and Sealing in Glasgow
 

Terrazzo Tile Steps and Grout Refreshed in Glasgow near Edinburgh Airport

External Terrazzo Tile Steps Refinished in Glasgow Read More »

porcelain tile and grout after cleaning bearsden

Porcelain Tiled Floor & Grout Restored in Bearsden near Glasgow

The photographs below are from a 55m2 Porcelain tiled floor that we worked on recently at a house in the town of Bearsden which is an affluent suburb of Glasgow. The floor was laid well with large format tiles which were in good condition however like most floors the grout had become stained and was now patchy and inconstant in appearance.

Porcelain tile and grout before cleaning Bearsden
The owner of the property thought we may need to replace the grout however I was confident we could resolve the problem without having to resort to that.

Porcelain tile and grout before cleaning Bearsden

Deep Cleaning Porcelain Tile and Grout

To get the tile and grout clean a strong dilution of Tile Doctor Pro-Clean was applied to the floor and grout lines and left to soak in for ten minutes. Pro-Clean is an effective tile and grout cleaner that has a strong alkaline formula so it’s safe to use on all types of tiled floors including natural stone.

The solution was then scrubbed in with a rotary machine fitted with a black scrubbing pad and the recessed grout lines were scrubbed by hand using a narrow stiff brush. Once this was completed the floor was rinsed with water and the now soiled cleaning solution extracted with wet vacuum.

This cleaned up the tiles nicely and also the grout, however although improved some of the grout was still discoloured and inconstant in appearance so I recommended we apply a grout colourant which would fully restore the appearance.

Applying Grout Colourant

I let the floor dry off completely following the clean before applying a Light Grey grout colourant, one of the ten different types of grout colourant we offer, which seals and rejuvenates the grout joints. Other colours include White, Black, and Cappuccino.

The colourant is applied using a small brush and then you wipe off any excess that gets on the tile before it gets chance to dry. It’s a laborious process however it was made easier by the large format tiles which meant there was less grout to apply the colourant too than usual.

Porcelain tile and grout after cleaning Bearsden
As you can see the grout nows looks much neater and cleaner, also the epoxy formula of the colourant adds a barrier over the surface of the grout that will protect it from future discolouration and make it much easier to clean.

Porcelain tile and grout after cleaning Bearsden
 

Porcelain Tiled Floor Cleaned and Grout Refreshed in East Dunbartonshire

Porcelain Tiled Floor & Grout Restored in Bearsden near Glasgow Read More »

Slate tiled kitchen floor before and after cleaning in Linwood

Slate Tile Cleaning and Grout Recolouring in a Linwood Kitchen

Kitchen tiles are never the easiest to keep clean. Food and drink spillages are likely to happen on a daily basis, especially if you live in a busy household. Not to mention the dirt and dust that builds up over time if the tiles are not treated to regular cleaning and maintenance. At this house in Linwood, a small town about 14 miles west of Glasgow, the Slate tiled kitchen floor, measuring approximately 8-10 square metres, wasn’t in a great state. In particular, the grout was very noticeably stained.

The property owner called me to help bring the floor back to looking it’s best again.

Slate floor tiles before grout colouring in Linwood

Cleaning Dirty Slate Tiles and Recolouring Grout

I started the restoration by cleaning the tiles and grout with Tile Doctor Neutral Tile Cleaner. This pH neutral cleaner is specially formulated for the regular cleaning of natural stone, unlike many supermarket-grade cleaners that are only really suitable for use on ceramics. The customer was also wary about the sealer on the Slate tiles being damaged, so I didn’t want to use anything stronger or acidic. Nonetheless, the Neutral Tile Cleaner did a fine job of removing any muck from the surface of the tiles and removing the stains from the grout.

Slate floor tiles during grout colouring in Linwood
I also recommended that the grout be recoloured in order to fully restore the appearance of the floor as a whole. I let the floor dry off completely following the clean, before applying our Natural Grey grout colourant, one of the ten different types of grout colourant we offer, which seals and rejuvenates the grout joints. Other colours include White, Black, and Cappuccino. In this case, I felt Natural Grey would match in best with the natural colours of the Slate. I then left the grout to dry before polishing off any excess colourant.

Slate floor tiles after grout colouring in Linwood
As you can see the grout nows looks much fresher and neater. The epoxy nature of the colourant will protect the grout from any future discolouration and make it much easier to clean. Certainly, the customer was very happy as she left the following
feedback:

“Steven contacted me quickly and we booked my job in. My Slate kitchen floor’s grout was discoloured, so we agreed he would clean and stain the grout. He came and carried out the work and he was excellent. Very happy with the work and his attitude was first class. Would highly recommend.”

Professional Tile and Grout Cleaning for a Slate Tiled Floor Restoration in Linwood

Slate Tile Cleaning and Grout Recolouring in a Linwood Kitchen Read More »

Slate Kitchen Floor Before and After Cleaning Sealing Gateside

Cleaning and Sealing Heavily Soiled Slate Tiles in Gateside

On rare occasions we encounter extremely dirty tiled floors which have clearly not been cleaned for months, or even years. As you can see from the first photograph, this Slate tiled floor at a property in Gateside is an example of one of these extreme cases, being completely caked in thick layers of dirt that had amassed over a long time.

Slate floor before cleaning Gateside
While Slate is typically more hard wearing and rougher in texture many other types of tile, this doesn’t mean that it requires less frequent maintenance. With the floor measuring in at 20×20 metres, getting the tiles back to looking their best would be a big job, and certainly one that required the attention of a professional.

Slate kitchen floor before cleaning Gateside

Cleaning an Extremely Dirty Slate Tiled Floor

As the tiles were exceptionally dirty, I applied a strong dilution of our alkaline cleaner, Tile Doctor Pro Clean, which can be used for both light soil buildup and very heavy soil buildup. After applying the product, I left it to dwell for a healthy period to allow it to break down the thick layers of dirt.

Slate kitchen floor after cleaning Gateside
I then used a black scrubbing pad fixed to a heavy rotary machine to scrub the tiles, extracting the resulting slurry using a wet vac machine. Due to how dirty the tiles were, I repeated this process several times until satisfied that the tiles were as clean as possible. Next, I paid attention to the grout, cleaning it by hand, again using Pro Clean. Once this was completed, I rinsed the floor a few times with clean water to remove any trace of chemical.

Slate floor after cleaning Gateside

Sealing a Slate Tiled Floor

I was keen to seal the floor the following day, so I installed a fan overnight to speed up the drying process. As many will already know, a tiled floor cannot be sealed until it is completely dry, or else the excess moisture will cloud the sealer.

Upon my return to the property the next morning, I used Tile Doctor High Shine to seal the floor as requested by the customer. This sealer is specifically designed for use on textured natural stone such as Slate, providing a durable, resistant and high shine surface seal. I applied four coats in total.

Slate kitchen floor after cleaning Gateside
The customer wasn’t at home when I finished the job, but he sent me a text later in the day to say just how impressed he was with the transformation of the floor. Another satisfied customer!

Slate kitchen floor after cleaning sealing Gateside
 

Professional Restoration of a Heavily Soiled Slate Tiled Floor in Ayrshire

Cleaning and Sealing Heavily Soiled Slate Tiles in Gateside Read More »

Slate Floor Treated with stone oil in Paisley

Black Slate Kitchen Tiles Rejuvenated in Paisley

This customer, who lives in Paisley, one of Scotland’s biggest towns – and one with a rich history in the textiles industry – had not been completely satisfied with her Slate tiled kitchen floor since it had been laid. Having only been laid recently, the tiles themselves were in good shape, but they lacked the aesthetic quality desired by the customer.

She wanted them to be a richer, darker black in colour while keeping the matte look – as she had seen advertised in the tile shop – but once laid the tiles had been left looking rather unexceptional. The floor area itself was only small (at around 12 metres squared), and I was confident I could have it looking much nicer in no time at all using the right products.

Slate Floor Cleaned in Paisley

Cleaning a Slate Tiled Kitchen Floor

To begin, I stripped away any previous sealer using a diluted mixture of Tile Doctor Pro Clean and Tile Doctor Remove and Go scrubbed into the tiles. This also helped to remove and bits of dirt and dust left on the floor. While the tiles, as mentioned, were in relatively good nick, I wanted to get the floor as clean as possible before giving it a fresh seal and my chosen combination of products did not let me down.

The floor was then neutralised with clean water, removing any outstanding cleaning chemicals, and the resulting cleaning slurry was promptly removed using a wet-vac machine. To finish the clean, I washed the tiles in pH Neutral Tile Cleaner, leaving it fresh and ready to be sealed.

Sealing a Slate Tiled Kitchen Floor

The next day I returned to the property to seal the Slate tiles making sure first that the tiles were dry. To restore the colour and texture of the Slate I started with an application of Tile Doctor Stone Oil which impregnates the pores of the stone and like a sealer provides a barrier to ingrained dirt once cured. To maintain the matt finish, as requested by the customer, I added a coat of Tile Doctor Ultra Seal.

Slate Floor Treated with stone oil in Paisley
Just looking at the before and after photographs it’s clear to see that the customer got that the exact result she had requested. Stone Oil worked wonders to restore the rich, dark tones to the Slate that had been so sorely lacking previously. The customer can also be assured that the sealer will be keep the floor easy to clean for a long time to come.

Slate Floor Cleaned and seaeled in Paisley
 

Professional Tile Cleaning and Sealing for a Slate Tiled Kitchen Floor in Glasgow

Black Slate Kitchen Tiles Rejuvenated in Paisley Read More »

Slate Floor Before and After Cleaning and Sealing in Lochwinnoch

Slate Kitchen Floor Stripped Cleaned And Sealed Lochwinnoch

These photographs of a Slate tiled kitchen floor are from a house in Lochwinnoch in the west central Lowlands of Scotland. You can see that the slate and grout was looking very dull and any sealer that was present had failed leaving the stone in need of a deep clean and re-seal.

Slate Floor Before Cleaning in Lochwinnoch

Cleaning Slate Floor Tile and Grout

On the first day we stripped the floor of any remaining sealer using Tile Doctor Pro-Clean mixed 50/50 with Remove and Go, this was left to dwell for 5-10mins before scrubbing it in with a scrubbing pad and then extracting the slurry with a wet vacuum. It was important to ensure all the sealer was removed in order to get an even finish and to avoid any compatibility issues when re-sealing later.

Slate Floor During Cleaning in Lochwinnoch
After this we focused on cleaning the grout using more Pro-Clean this time worked in using a stiff grout brush by hand. Once done the floor was given a thorough rinse using a diluted solution of Tile Doctor Neutral Clean to remove any trace of cleaning solutions that may impact the sealer and again using the wet vacuum to get the floor as dry as possible.

Sealing Slate Floor Tiles

The floor was left to dry off overnight and then we returned on the second day to seal the slate with Tile Doctor Seal and Go which is a water based sealer (no smell) which adds a nice sheen to the tile and gave the desired finish. Slate is quite porous so five coats of Seal and Go were required to ensure the floor was fully sealed.

Slate Floor After Cleaning and Sealing in Lochwinnoch
 

Cleaning and Sealing a Slate tiled floor in Renfrewshire

Slate Kitchen Floor Stripped Cleaned And Sealed Lochwinnoch Read More »

Bathroom Floor Paisley Before and After Grout Colouring

Refreshing Bathroom Wall and Floor Grout in Paisley

To clean grout we normally recommend a good scrub with Tile Doctor Pro-Clean which is an strong alkaline product, in some cases however the staining cannot be removed completely and the only thing your can do with the exception of re-grouting is to re-colour the grout with a Grout Colourant which are available in ten popular colours.

In the case of this bathroom at a house in Paisley near Glasgow both the floor of the bathroom and the shower wall tiles were in need of a refresh and after a review of possible solutions is was agreed the easiest thing to do would be to re-colour the floor grout with a Light Grey colourant and the wall tiles with a White colourant.

Bathroom Floor Paisley Before Grout Colouring Shower Wall Tiles Paisley Before Grout Colouring

Cleaning and Colouring Grout

The first step before grout colouring is to give the grout a good scrub with Tile Doctor Pro-Clean to get it as clean as possible before applying the colourant. The grout was then rinsed and then dried ready for the colourant to be applied. You may be surprised to hear but we often find the biggest cause of staining to grout are the dyes contained in soaps and shampoos.

Once the grout is ready it’s a straightforward process of applying the colourant evenly along with thin coats along the grout line working the brush backwards and forwards whilst minimising the amount that gets on the tile. We were not changing the colour of the grout substantially so one coat of colourant was sufficient for both sets of tile.

With two colours being applied we were careful to ensure different brushes were used for each job to avoid any contamination and once the job was complete a damp pad was used to remove excess product from the tile surface.

Bathroom Floor Paisley After Grout Colouring Shower Wall Tiles Paisley After Grout Colouring

As you can see from the photographs the difference was immediate, the other advantage of the colourant is it forms a barrier over the grout protecting it from staining and making it easier to clean going forward.

Quarry Tile and Grout Cleaning and Colouring in Livingston, West Lothian

Refreshing Bathroom Wall and Floor Grout in Paisley Read More »

Bathroom in Kilmacolm After Refresh

Ceramic Tiled Bathroom Refresh in Kilmacolm

This bathtub with shower over was at a house in the village of Kilmacolm near Greenock. As you can see from the photograph below the grout was stained in places and a tile had become loose behind the taps due to a previous leak causing it to fall out.

Bathroom Refresh Before Kilmacolm

Refreshing a Ceramic Tiles Bathroom

The first job was to put the loose ceramic tile back on the wall, a process involving the scraping off the adhesive and grout from the wall and tile before re-fixing with fresh tile adhesive and the grouting. We placed a blanket in the bathtub during the work to protect it.

Next the tiles were given a wash down Tile Doctor Pro-Clean with particular attention paid to the grout by scrubbing it with a stiff brush. It was our intention to use a grout colourant on the grout and I wanted to ensure we had a good bond.

Whilst the tiles were drying I set about stripping off the old silicone sealant between the bath and the ceramic tiles wall, debris cleared and any remaining sealant was carefully scraped away and then replaced with new silicone.

Grout Colouring

Last step was to apply two coats of white Tile Doctor Grout Colourant, this product is basically painted on top of the existing grout with any excess wiped off the adjacent tile before it dries. It’s an epoxy based formula that becomes a long lasting barrier protecting the grout and also making it much easier to clean, it looks natural and combined with the new silicone it gave the whole bath surround a real uplift.

Bathroom in Kilmacolm After Refresh
The job was completed in a day and I think you will agree the whole bath area now looks like a new installation.

Refreshing a ceramic tiled surround in the Clyde Valley

Ceramic Tiled Bathroom Refresh in Kilmacolm Read More »

Natural Rough Slate Tiled Floor Touch Estate After Cleaning and Sealing

Natural Rough Slate Tiles Renovated at Stirling Business Park

The photographs on this page are of a natural Rough Slate tiled floor installed in the ground floor and stairs of the Touch Business Centre in Stirling where recent building renovation works had left the floor covered in dirt and plaster dust which they couldn’t remove. The owner of the business centre now needed the floor renovating prior to renting out the units to new tenants.

Dating from around 1750 the business units had been converted within the stable block of a large house; now a listed building they would originally have been used for horses and carriages before becoming a milking parlour, estate workshops and garages. The conversion was supported by Historic Scotland and had to retain the feel and features of an historic building and the slate floor was an important part of this.

Natural Rough Slate Tiled Floor Touch Estate Before Cleaning

Cleaning Slate Floor Tile and Grout

To remove the dirt and plaster we used a dilution of Tile Doctor Remove and Go which is a strong coatings remover that’s safe to use on natural stone but also very effective. It was mopped onto the tile and left for around twenty minutes to allow it to soak into the pores of the tile and get to work and break down and soften any remaining sealer and plaster etc. This was then scrubbed into the tiles using a black pad fitted to a rotary machine running on a slow speed; the resultant soiled cleaning solution was then extracted using a wet vacuum, the floor rinsed and the process repeated until we were satisfied the floor was completely clean.

Natural Rough Slate Tiled Stairs Touch Estate During Sealing Natural Rough Slate Tiled Stairs Touch Estate During Sealing

Sealing Slate Floor Tiles

After allowing the floor sufficient time to dry we returned on-site to seal the slate tile and protect it from stains etc checking first with a damp meter that the tiles were indeed dry. To seal the floor we used five coats of Tile Doctor Seal and Go which is a water based sealer (no smell) which adds a nice sheen to the tile and gave the desired finish.

Natural Rough Slate Tiled Floor Touch Estate After Cleaning and Sealing
 

Cleaning and Sealing a Slate tiled floors after Building works in Sterling

Natural Rough Slate Tiles Renovated at Stirling Business Park Read More »

Lyle Kirk Church Quarry Tiles After Cleaning Greenock

Restoring an Old Quarry Tiled Church Floor in Greenock

The photographs below are from the Lyle Kirk Church of Scotland in Greenock where we asked to clean the Quarry tiles in the main entrance of the church. As you can imagine the floor is very busy and is constantly in use from parishioners and had now become very unappealing from ingrained dirt and was proving impossible to clean effectively.

Lyle Kirk Church Quarry Tiles Before Cleaning Greenock Lyle Kirk Church Quarry Tiles Before Cleaning Greenock

Cleaning Old Quarry Tiles

With such an old floor we had to take a lot of care and so using a buffer machine to speed up the process was out of the question. As a result so we cleaned the whole tiled floor including the grout by hand using various strength dilutions of Tile Doctor Remove and Go and then Pro-Clean to remove the years of wax and coatings from the tiles, both products I should mention are safe to use on tile, stone and grout. It was arduous and slow work taking us four days to complete and the floor was given a thorough wash down once clean to remove any trace of cleaning product before sealing.

Dealing with Efflorescence

Whilst cleaning the floor we noticed some signs of efflorescence which is where salts from the ground below evaporate up through the pores in the tile and leave white deposits on the surface of the tile above. The efflorescence was removed easily using Tile Doctor Grout Clean-Up but it alerted us to the fact that normally old floors were traditionally laid directly on compacted earth with no damp proof course and that damp could be an issue that could affect the sealer.

Lyle Kirk Church Greenock

Sealing an old Quarry Tiled Floor

We left the floor to dry off and when we returned being cognizant of the damp issue we chose Tile Doctor Seal and Go Extra to seal the floor, this a new sealing product which is highly breathable and ideal for sealing external tiles or internal tiles where there is a damp problem. Four coats were sufficient and once done the floor looked completely transformed.

Lyle Kirk Church Quarry Tiles After Cleaning Greenock Lyle Kirk Church Quarry Tiles After Cleaning Greenock


Church Floor restored in Greenock

Restoring an Old Quarry Tiled Church Floor in Greenock Read More »

Steve Thomson accepts the 2015 Tile Doctor of the Year Trophy for Tile Doctor Operations Director Russell Taylor

Tile Doctor of the Year Award

I’m very pleased to announce that I recently won the Tile Doctor of the Year award for 2015. There is very stiff competition for the award with over 50 UK wide Tile Doctors taking part and in the end it was a very close race between myself and my nearest rival Mick Conlon who is the Tile Doctor for Cambridge.

Steve Thomson accepts the 2015 Tile Doctor of the Year  Trophy for Tile Doctor Operations Director Russell Taylor
Steve Thomson accepts the 2015 Tile Doctor of the Year Trophy for Tile Doctor Operations Director Russell Taylor

The award was presented at the Jury’s Inn in Nottingham during the Tile Doctor annual conference where we got together to discuss the latest developments in Tile, Stone and Grout maintenance.

The award is mainly based on Customer Feedback so I would like to thank all of my customers who took the time to complete the feedback form.

Tile Doctor of the Year Award Read More »

Moroccan Encaustic Cement Tiles Barrhead After Cleaning

Moroccan Encaustic Cement Tiled WC Refresh in Barrhead

Similar in many ways to Victorian tiles, these are Moroccan Encaustic Cement tiles which come in a huge range of patterns and are ideal for indoor and external use although they should be sealed to protect against water penetration and dirt as well as making cleaning easier. Very popular in hot countries, they certainly add a nice flair which they have done to this ground floor WC at residence in Barrhead which is a town south west of Glasgow in East Renfrewshire.

Moroccan Encaustic Cement Tiles Barrhead Before Cleaning

Cleaning a Victorian Floor

The tiles were looking rather dull and in need of a deep clean and re-seal so the first job was to clean the floor and remove and remaining sealer by applying a strong solution of Tile Doctor Pro-Clean worked in using a black scrubbing pad fitted to a rotary bonnet machine, with all the excess extracted using a wet vacuum. This process was repeated three times until I was satisfied any remaining sealer had been removed and the tile and grout was now as clean as it could be. The floor was then given a rinse with water and cleaned again with Tile Doctor Neutral Tile Cleaner to remove any trace of Pro-Clean; again the fluids were extracted using a wet vacuum.

Sealing a Victorian Floor Sealing

The floor was left to dry overnight and we came back the next day to seal it using six coats of Tile Doctor Seal and Go which works well on these types of tiles as it adds a nice subtle sheen as well as adding the necessary stain protection.

Moroccan Encaustic Cement Tiles Barrhead After Cleaning
 

Moroccan Tiled floor cleaned and sealed in Renfrewshire

Moroccan Encaustic Cement Tiled WC Refresh in Barrhead Read More »

Porcelain tiled shower room in Inchinnan after

Deep Cleaning Porcelain Bathroom Tiles in Inchinnan

The Porcelain tiles in this bathroom installed at a house in the small village Inchinnan were in good physical condition but were looking dull and being let down by the grout which had gone dark in a number of areas. This is often the case with Porcelain floors which are very tough and generally out-live the life of the grout which has a porous top layer that is subject to staining especially from the dyes in personal products.

Porcelain tiled shower room in Inchinnan before

Deep Cleaning Porcelain Tile and Grout

To get the tile and grout really clean a strong dilution of Tile Doctor Pro-Clean was applied to the tile and grout and left to soak in to the surface for around ten minutes before scrubbing it in; the area was quite restrictive so this process was done by hand. The soiled cleaning solution was then then rinsed away with warm water which was removed by a wet vacuum and stubborn areas sport treated. The floor was then given a final wash with Tile Doctor Neutral Cleaner diluted with water to remove any remnants of Pro-Clean and then dried as much as possible.

Grout Colouring

The cleaning process made a big difference to the Tile and Grout however there grout still showed evidence of staining. To resolve this we would have need to laboriously scrape out the grout and re-grout it; however this does take a long time and there is a quicker solution by using a Grout Colourant. Grout Colourants apply a thin but impermeable epoxy layer on top of the existing grout and come in a range of colours which is handy if you want to completely alter the look of your floor. In this case however the customer was happy to have the white original colour of the grout restored; two coats were sufficient to achieve this.

Once done and dry we gave the floor another rinse with Neutral Cleaner and finished by buffing the Porcelain tiles with a white pad on a hand polishing machine which brought up the natural shine on the tiles.

Porcelain tiled shower room in Inchinnan after
 

Rejuvenating Bathroom Tiles in Renfrewshire

Deep Cleaning Porcelain Bathroom Tiles in Inchinnan Read More »

Slate tiled floor Huston after cleaning and sealing

Slate tiled kitchen floor cleaned and re-sealed in Houston

This particular Slate tiled floor was installed in the kitchen of a house in Huston, that’s Houston near Glasgow not the city in Texas. This is another example of a natural stone floor was overdue a deep clean and re-seal, any remaining sealer on the slate has worn off and the tiles have become dull and stained.

Slate tiled floor Huston before cleaning

Cleaning Slate Floor Tile and Grout

First we stripped any remaining sealer from the slate tiles by applying a strong solution of Tile Doctor Pro-Clean which was left to soak in before being worked into the stone using a black pad on a rotary bonnet machine; the resultant soiled cleaning solution was then extracted using a wet vacuum. This process was repeated three times to make sure all the sealer and dirt was completely removed and extracted.

After this we focused on cleaning the grout using more Pro-Clean this time worked in using a stiff grout brush by hand. Once done the floor was given a thorough rinse using clean water again using the wet vacuum to remove the water and get the floor as dry as possible.

Changing the Colour of Grout

We then left for the evening to allow the floor to dry off overnight and returned the second day and coloured the grout to dark grey using a grout colouring kit to achieve an even grout appearance. This is rather painstaking work but the effect is well worth the effort, then once that had dried we gave the floor a quick clean using Tile Doctor Neutral Cleaner.

Sealing Slate Floor Tiles

After allowing to dry overnight again, we came back the third day to seal the slate tiles for which we used six coats of Tile Doctor Seal and Go which is a water based sealer (no smell) which added a nice sheen to the tile and gave the desired finish.

Slate tiled floor Huston after cleaning and sealing
 

Cleaning and Sealing a Slate tiled floors in Huston, Renfrewshire

Slate tiled kitchen floor cleaned and re-sealed in Houston Read More »

Porcelain Tiles Glasgow After Deep Cleaning

Deep Cleaning Porcelain Kitchen Tiles in Glasgow

Porcelain tiles are very hard wearing and a great choice for kitchens where they are likely to see a large amount of foot traffic, you do need to be careful however if they are the micro porous porcelain which as the name suggests are slightly porous and can trap dirt and become difficult to clean. The other problem you are likely to have with any tiled floor is the grout which has a porous top layer that can become stained.

This was the case with the kitchen floor tiles at this house in Glasgow where you can see from the photograph below the improvement in the centre of the floor where we had test cleaned the tiles; the grout used was dark in colour which hides the dirt so unfortunately you cannot tell from the photograph the improvement in the grout.

Porcelain Tiles Glasgow Before Deep Cleaning

Deep Cleaning Porcelain Tile and Grout

To get the tile and grout really clean a strong dilution of Tile Doctor Pro-Clean was applied and left to soak in to the surface for around ten minutes before scrubbing it into the tile with a bonnet machine fitted with a black scrubbing pad and also a stiff hand brush along the grout lines. This was then rinsed away with warm water all of which was removed by a wet Vacuum. This whole process was repeated three times until we were satisfied that the tile and the grout was looking new again after which the floor was given a final wash with Tile Doctor Neutral Cleaner and then dried as much as possible using the wet vacuum.

Porcelain Tiles Glasgow After Deep Cleaning
 

Deep Cleaning Porcelain Kitchen Tiles in Glasgow

Deep Cleaning Porcelain Kitchen Tiles in Glasgow Read More »

Terrazzo vestibule After cleaning and sealing in Glasgow

Terrazzo Vestibule Refreshed in Glasgow

Just to prove we take on any job large or small I thought I would post the details of this small Terrazzo Vestibule that we recently cleaned at the entrance to a house in Glasgow. The Terrazzo was not looking its best which is hardly surprising being in front of the main entrance to the house it must have seen a lot of foot traffic over the years.

Terrazzo vestibule before cleaning in Glasgow

Cleaning and Burnishing a Terrazzo Floor

Terrazzo is a very hard surface and as a result it has to be treated in the same way as other hard surfaces such as Travertine, Limestone and Marble which typically involve burnishing the surface to remove the dirt and restore the appearance.

Before burnishing the floor was cleaned using a strong dilution of Tile Doctor Pro-Clean which was left to dwell on the Terrazzo for a while before being scrubbed in by hand due to it being such a small area; following that the floor was given a quick rinse with water and a quick clean with Tile Doctor Neutral Cleaner to remove any trace of strong cleaning product.

The next step was to burnish the floor using a set of four diamond encrusted burnishing pads. You start with a coarse 400 grit burnishing pad which is run over the surface with a little water to help lubricate and this removes surface dirt and coatings such as sealers. Once that was finished we moved onto the medium 800 grit pad which is the first step of the polishing process and also removes ingrained dirt. The surface of the Terrazzo is still quite rough at this stage so once complete with the medium pad the fine (1,500 grit) is used smooth down the surface and continue to build up the polish in the floor. The last pad is a very fine (3,000 grit pad) and this pad builds on the existing polished effect to create a high shine finish.

All these pads are applied with water and the resultant slurry needs to be cleaned off during the process with the final step of giving the floor a thorough rinse with clean water.

Sealing a Terrazzo Floor

Once the floor was completely dry it was sealed using two coats of Tile Doctor Colour Grow which is an impregnating sealer designed to bring out the natural colours in the stone and penetrate into the pores of the tile preventing dirt from getting in there and providing maximum on-going stain protection. The floor was then buffed using a white buffing pad to bring up the shine further and remove any smears left from sealing.

Terrazzo vestibule After cleaning and sealing in Glasgow
 

Deep Cleaning a Terrazzo Vestibule in Glasgow

Terrazzo Vestibule Refreshed in Glasgow Read More »

Dark slate tiled floor glasgow after cleaning

Dark Slate tiles cleaned and Grout Coloured in Glasgow

Slate is a hard-wearing product ideal for floors however it does need a sealer to bring out the best in it and sealers do wear off after a few years and this had happened with the Slate tiled floor in this post. The floor was now looking dull and the grout had also discoloured so time to call in Tile Doctor to breathe new life into the tile and grout.

Dark slate tiled floor glasgow before cleaning

Cleaning a Slate Floor

It’s not a good idea to apply a new sealer on-top of existing as it can affect the final result so the first task was to strip back the floor to the natural stone giving the Slate and Grout a thorough clean in the process.

To do this a strong solution of Tile Doctor Tile Doctor Pro-Clean was applied and left to soak into the floor for about 20 minutes; Pro-Clean has a strong alkaline base so it’s safe to use on Stone as opposed to a weak acid cleaner. After twenty minutes it was worked into the slate and grout using a low speed bonnet machine fitted with a black scrubbing pad with the excess extracted using a wet vacuum.

This process was repeated three times to make sure all the old sealer and dirt was completely removed and after this the grout was cleaned by hand using more Pro-Clean and a stiff brush. Once done the whole floor was then neutralised with more water to ensure there was no trace of cleaning product remaining on the floor prior to sealing.

Grout Colouring

The floor was left to dry off overnight and returned the second day to colour the grout to dark grey which made a big improvement to the overall look of the floor; the grout colours we use come in 12 colours so we can usually find one that matches the customers’ requirements, once applied they also form a great barrier preventing future staining. Once the colourant has dried the floor was given a further clean with Tile Doctor Neutral Cleaner which is an everyday cleaning product we recommend for sealed floors.

Sealing a Slate Floor Sealing

The floor was left to dry and we came back two days later to re-seal the tile for which we used five coats of Tile Doctor Seal and Go which is a great sealer for Slate tiled floors as it leaves a low sheen finish whilst providing excellent stain protection. I should mention that Seal and Go is also a water based sealer so it doesn’t leave a smell whilst it’s drying.

Dark slate tiled floor glasgow after cleaning
We left the floor to dry overnight again and came back the third day to seal the Slate tiles for which we used six coats of Tile Doctor Seal and Go which give a subtle shine to the tiles and matched the customers requirements.

Cleaning and Sealing Slate tiled floors in Glasgow

Dark Slate tiles cleaned and Grout Coloured in Glasgow Read More »

Slate Doorway Before and After

Slate Tiled Staircase Cleaned and Sealed in Glasgow

These photographs were taken some time ago however I thought they might be interesting as Glasgow has an interesting mix of architecture and occasionally we are asked to clean some unusual buildings including this one which had a stone winding staircase faced with slate tile which was overdue for a clean and seal.

Slate tiled stairs in Glasgow before Slate tiled stairs in Glasgow before

Cleaning a Slate Tiled Staircase

Stairs are a high traffic area and if there was any sealer left on the slate treads it was minimal so I decided to apply a strong dilution of Tile Doctor Pro-Clean. This was left on to soak into the slate tiles for about 20 minutes before being scrubbed in by hand (no room for a rotary machine).

Slate tiled stairs in Glasgow before
This was worked into the slate and grout until I was happy the tile and grout was clean. The soiled cleaning solution was removed using a wet vacuum and the floor neutralised with more water to ensure no chemicals remained on the floor prior to sealing.

Sealing a Slate Tiled Staircase

It was a small area so it only took a few hours for the tiles to dry so later that afternoon I was able to seal the slate for which we used five coats of Tile Doctor Seal and Go which adds a nice subtle sheen finish and will protect the tiles from staining going forward.

Slate tiled stairs in Glasgow after Slate tiled stairs in Glasgow after


Cleaning and Sealing Slate tiled stairs in Glasgow

Slate Tiled Staircase Cleaned and Sealed in Glasgow Read More »

Gruby Ceramic Tiled Shower in Bishopton After

Grubby Ceramic Tiled Shower Cubicle Refreshed in Bishopton

This shower cubicle was installed in the main bathroom of a house in Bishopton where the grout had become quite grubby and the Ceramic tiles were looking quite dull. The owner was thinking about re-tiling the bathroom and thought they would give us a call first to see if we could refresh the look without the expense.

Gruby Ceramic Tiled Shower in Bishopton Before Gruby Ceramic Tiled Shower in Bishopton Before

Cleaning Ceramic Tile and Grout

We started by spraying the tiles with Tile Doctor Oxy-Pro which is a strong high-alkaline cleaner especially formulated and packaged for cleaning showers. The spray delivery is important as mixing the cleaning product with air makes it lighter and helps it cling to the tile and grout. The Oxy-Pro was left to soak into the tiles for around 15 minutes before being scrubbed into the tile and grout using a stiff grout brush. This action cleaned up the grout and tile nicely removing stains from shampoos and soaps etc.

Removing Mould from Grout

The grout was looking much improved but there was however some evidence of mould remaining which needed dealing with. To tackle this we used Tile Doctor Mould Away which is designed to remove mould off Silicone and Grout. It’s very easy to use, you simply spray the Silicone or Grout to be treated with Mould Away then leave to soak in for five minutes and then scrub with a brush and rinse with water repeating the process until the mould has disappeared.

Gruby Ceramic Tiled Shower in Bishopton After Gruby Ceramic Tiled Shower in Bishopton After

It took a fair amount of manual effort but the results were well worth it as you can see.

Grubby Ceramic Tiled Shower Cubicle Refreshed in Bishopton Read More »

Glasgow Ceramic Shower Refresh After Cleaning

Mouldy Ceramic Tiled Shower Refreshed in Glasgow

A customer contacted us regarding a Ceramic Tiled Shower Cubicle problem they had with their house in Glasgow. The grout and mastic sealant had started to discolour and there was staining on both from mould which is quite a common problem in modern houses and our busy lifestyles and insulated homes with insufficient ventilation.

Cleaning Ceramic Tile and Grout

We started by giving the tiles a good scrub with Tile Doctor Pro-Clean then focusing on the grout we thoroughly scrubbed it with more Pro-Clean and a stiff grout brush, this process did well to clean up the tile and grout but unfortunately the grout had become too badly stained to be satisfactory. It’s a fact that the top layer of grout is actually porous and this is where the staining from the dyes in shampoos etc. will occur.

The next step was to cut out all the old and mouldy mastic and seal around the shower using a sharp knife taking care not to scratch the shower tray.

Glasgow Ceramic Shower Refresh Before Cleaning Glasgow Ceramic Shower Refresh After Cleaning

Recolouring Grout

To overcome the stained grout issue we gave the whole of the grout two coats of white Grout Colourant which is a very effective treatment that forms an epoxy barrier over the gout protecting it from future staining. Normally when you do this we recommend using a pre-treater product that provides a chemical key that allows the colourant to latch on to, in this case however I was happy that the scrubbing we gave the grout with Pro-Clean would have the same effect. The tiles were then wiped down using Tile Doctor Neutral Cleaner to remove any excess colourant from the tiles and give them a finishing shine.

The last step was to Shower was finished off by applying new silicone sealant to the areas that were removed. The final result was a shower cubicle that looked recently installed.

Refreshing a Ceramic Tiled Shower Cubicle in Glasgow

Mouldy Ceramic Tiled Shower Refreshed in Glasgow Read More »

Cleaning Flagstones in Glasgow

Flagstone Tiles Cleaned and Sealed in Glasgow

These photographs are of a Flagstone floor tiled floor installed at a house in Glasgow. They were well worn, looking washed out and overdue a deep clean and re-seal, there was also remnants of adhesive and paint and I suspect the floor had been covered in carpet at some point in the past.

Cleaning Flagstones in Glasgow

Cleaning Flagstone Floor Tiles

Working in sections the tiles were covered in Tile Doctor Remove and Go which as the name suggests is designed to safely remove coatings from tiles, this was left to soak in for a while before scrapping off the glue and paint from the stone surface using a wire brush and paint scrapers.

The second step was to scrub the floor using a strong dilution of Tile Doctor Pro-Clean worked in using a rotary bonnet machine fitted with a hard nylon brush attachment. The floor was then then rinsed down with clean water and the soiled solution extracted using and industrial wet vacuum. This process was completed three to four times to ensure all the dirt was removed.

The floor was then left to dry assisted by a turbo air mover and damaged pointing and cracks between the stone was patched up using a sand/cement mortar. The cleaning and repairing process took most of the day so once complete we left for the day leaving the turbo air mover switched on to ensure the floor would be nice and dry of the next day.

Cleaning Flagstones in Glasgow Cleaning Flagstones in Glasgow

Sealing Flagstones

We returned the next day and once we had checked the stone had dried we proceed to seal it using five coats of Tile Doctor Seal and Go which will protect the floor and also adds a nice sheen to the tile.

Cleaning Flagstones in Glasgow
 

Flagstone floor cleaned and sealed in Glasgow

Flagstone Tiles Cleaned and Sealed in Glasgow Read More »

Victorian Mosaic tiles glasgow after cleaning

Victorian Mosaic Hallway Tiles Cleaned and Sealed in Glasgow

These unusual period Victorian mosaic tiled floor at a residence in the west end of Glasgow were far from looking their best and well overdue for a deep clean and re-seal.

Victorian Mosaic tiles glasgow before cleaning Victorian Mosaic tiles glasgow before cleaning

Cleaning a Victorian Floor

I’ll try and keep the details short so as not to lose your attention but basically the tiles were first stripped from all sealers and coatings that had been previously applied to the floor using a strong dilution of Tile Doctor Remove and Go which was left to dwell for an hour before working it in with a rotary machine fitted with a black scrubbing pad and then rinsing the floor with water which was extracted with a wet vacuum. Secondly we then cleaned the floor four times using a rotary machine and a strong mixture of Pro-Clean which was again wet extracted and rinsed again. Finally we cleaned and rinsed the floor using Tile Doctor Neutral Cleaner to neutralise the tiles from any products which may affect the sealer before leaving the floor overnight to dry assisted with a turbo air mover.

Sealing a Victorian Floor Sealing

Once the floor was dry it was then sealed using two coats of Tile Doctor Colour Grow which brings out the colour in the tile and provides the matt effect the owners were looking for as well as protecting the floor from staining.

Victorian Mosaic tiles glasgow after cleaning Victorian Mosaic tiles glasgow after cleaning


Victorian Mosaic Tiled floor cleaned and sealed in Glasgow

Victorian Mosaic Hallway Tiles Cleaned and Sealed in Glasgow Read More »

Slate Tiles in Glasgow Kitchen After Cleaning and sealing

Slate Tiles Cleaned and Sealed in a Glasgow Kitchen

These Slate tiles were installed in the kitchen of a house in Glasgow and as you can see from the photograph below they were looking dull and tired and there was evidence of grout haze over a lot of the tiles. The Tile Doctor diagnosis was that a face lift was in order for which a deep clean and re-seal was prescribed.

Slate Tiles in Glasgow Kitchen Before Cleaning

Cleaning a Slate Floor

The first step was to sweep up all the loose debris from the floor; we scrub the floor quite hard during our work so it’s important to remove any grit that could scratch the surface of the tile. We then mixed a dilution of Tile Doctor Remove and Go 50/50 with Nanotech Ultra Clean and began to work the solution into the floor allowing it to dwell for around an hour first (This process helps to soften and break down the remains of the sealer on the stone). We used a hard deck scrubber to agitate the chemicals and loosen the dirt and old sealer from the floor which is then extracted from the surface using a wet vacuum and rinsed down with clean water several times to make sure all chemicals are removed.

The next step was to apply a dilution of Tile Doctor Grout Clean-up which was then scrubbed the floor once again with hard deck scrubber. This broke down and removed all of the cement/ grout haze that the installer had left over the surface of the tile, again the floor was then rinsed with water and extracted to remove any chemical residue.

The floor was scrubbed again this time using a dilution of Tile Doctor Pro-Clean to make sure all old sealer, cement, grout haze and dirt had been completely removed. We then give the floor a thorough and final rinse and mopped the tiles with Neutral Tile Cleaner to neutralise any remaining trace of chemicals and removed the solution using the wet vacuum before leaving the floor to dry overnight.

Sealing a Slate Floor Sealing

Once the floor was dry it was then sealed using five coats of Tile Doctor Seal and Go which was chosen to provide the desired finish that the customer wanted.

Slate Tiles in Glasgow Kitchen After Cleaning and sealing
 

Slate Tiled Kitchen floor cleaned and sealed in Glasgow

Slate Tiles Cleaned and Sealed in a Glasgow Kitchen Read More »

School Terrazzo Floor Kilmacolm after cleaning

Terrazzo Floor Cleaned at Kilmacolm School

This Terrazzo Floor was at the entrance to a School in Kilmacolm where as you can see from the photograph below had come under some heavy use and was now proving difficult to keep clean. We were asked to give it a deep clean, polish and re-seal therefore making it much easier to maintain going forward.

School Terrazzo Floor Kilmacolm before cleaning

Cleaning a Slate Floor

Hard stone surfaces such as Terrazzo have to be burnished to get the shine back and this process basically involves cutting back the surface with a set of diamond encrusted burnishing pads.

Before burnishing however the floor was swept out to remove any loose debris that could get caught under the pads and scratch the floor. Once that was done a Coarse 400 grit burnishing pad was fitted to our heavy rotary machine and run over the surface with a little water to help lubricate the process, the coarse pad removes surface dirt and coatings such as sealers. Once that was finished we moved onto the medium 800 grit pad which is the first step of the polishing process and also removed ingrained dirt. The surface of the Terrazzo is still quite rough at this stage so once complete with the medium pad the fine (1,500 grit) is used smooth down the surface and continue to build up the polish in the floor. The last pad is a very fine (3,000 grit pad) and this pad builds on the existing polished effect to create a high shine finish.

All these pads are applied with water and the resultant slurry needs to be cleaned off during the process with the final step of giving the floor a thorough rinse with clean water, I can recommend a wet vacuum at this point as it makes light work of removing liquids from floors.

Sealing a Terrazzo Floor

Once the floor was completely dry it was sealed using two coats of Tile Doctor Colour Grow which is a great product to use of these characteristic floors as it brings out the colour in the floor as well as providing on-going stain protection. The floor was then buffed using a white buffing pad to bring up the shine further; needless to say our client was extremely happy with the finished result.

School Terrazzo Floor Kilmacolm after cleaning
 

School Terrazzo floor Cleaned, Polished and Sealed

Terrazzo Floor Cleaned at Kilmacolm School Read More »

Slate Kitchen Floor Tiles Glasgow after cleaning

Slate tiled floor cleaned and re-sealed in Glasgow

The photographs below are from the Kitchen of a house in Glasgow with a Slate tiled floor fitted. The sealer on the slate has started to go and if you look closely at the photographs you can see how tired and dull the tiles are looking; this is a common problem with natural stone floors where you will find the sealer wears down and dirt starts to penetrate into the tile making it difficult to clean effectively.

Slate Kitchen Floor Tiles Glasgow before cleaning Slate Kitchen Floor Tiles Glasgow before cleaning

Cleaning a Slate Floor

The first job with any clean and seal work of this nature is to protect the kitchen units by removing the kick boards and then to remove any sealers and coating from the tile so when you re-seal you’re not trapping in dirt or layering on top of another potentially incompatible sealer.

The original sealer had almost worn off so a strong dilution of Tile Doctor Pro-Clean mixed 50/50 with NanoTech Ultra Clean was applied and left to soak into the floor for about 20 minutes. Pro-Clean is a multi-purpose cleaning product that will strip a sealer off the floor if weakly diluted whereas the NanoTech Ultra Clean adds tiny abrasive particles into the mixture increasing the cleaning power of the solution. This was worked into the slate and grout using a buffing machine fitted with a black scrubbing pad until I was satisfied the floor had been stripped and cleaned of all surface coatings and dirt. All the dirty water was extracted with a wet vacuum and the floor neutralised with more water to ensure no chemicals remained on the floor prior to sealing.

Sealing a Slate Floor Sealing

The floor was left to dry and we came back two days later to re-seal the tile for which we used five coats of Tile Doctor Seal and Go which is a great sealer for Slate tiled floors as it leaves a low sheen finish whilst providing excellent stain protection. I should mention that Seal and Go is also a water based sealer so it doesn’t leave a smell whilst it’s drying.

Slate Kitchen Floor Tiles Glasgow after cleaning Slate Kitchen Floor Tiles Glasgow after cleaning

Overall I was quite pleased with the floor although there were some stubborn grout stains that proved to be tough to shift.

Cleaning and Sealing Slate tiled floors in Glasgow

Slate tiled floor cleaned and re-sealed in Glasgow Read More »

Filled Travertine Tiled Shower After Cleaning

Mouldy Travertine tiled bathroom cleaned in Glasgow

This mouldy filled Travertine tiled bathroom was located in a house in Glasgow and as you can see from the photograph below was completely covered in mould right round the whole bathroom, there was also some staining from the dyes in soap etc.

Mouldy Filled Travertine Tiled Shower Before Cleaning

Cleaning a mouldy Travertine tiled bathroom

Firstly we cut out all the mouldy silicone with a sharp knife and once this was done we mixed a strong solution of Tile Doctor Pro-Clean in a spray bottle and sprayed the cleaning product onto the walls, we used a spray as the air makes the solution lighter and stick onto the tile. Once this was done the Pro-Clean was scrubbed into the stone with stiff brushes and a lot of elbow grease using small nail brushes to allow us to get into all the tiny dimples in the filled travertine. Travertine is a natural product so Pro-Clean being a strong alkaline product is ideal for cleaning natural stone as even mildly acidic cleaners can eat away at the stone.

Sealing Travertine Tiles

Once the tiles were cleaned they were then sealed with two coats of Tile Doctor Colour Grow which is a colour enhancing sealer which is designed to protect the stone whilst lifting the colours out.

Grout Colouring

The grout was still discoloured following the cleaning process so to get it looking fresh again and after the stone was sealed we applied white grout colourant which brought the grout back to perfect white. This was done after sealing to stop the colourant absorbing into the tiles when they were un-protected making it easier to wipe off. The grout colourant we use looks natural and also forms a barrier over the grout making it easy to clean.

Once everything else was complete we finished the job off by renewing the white silicone up the corners of the walls and around the bath; the end result was a huge transformation that both us and the customer were more than happy with.

Filled Travertine Tiled Shower After Cleaning
 

Mouldy Travertine tiles rejuvenated in Glasgow

Mouldy Travertine tiled bathroom cleaned in Glasgow Read More »

Marble Tiled Floor After Cleaning

Marble Tiled Pantry Cleaned and Polished at Kinross House

This Marble tiled floor is located in the pantry of the historical Kinross House which is a late 17th-century country house overlooking Loch Leven that was built by the architect Sir William Bruce as his own home in 1686. You can see from the photograph the floor was in quite a state and given the history it was an honour to be asked to work on the floor.


Kinross House, Kinross, Kinross-shire, Scotland
Photo Courtesy of Kinross House, Kinross, Kinross-shire, Scotland


Marble Tile Cleaning and Polishing

We brushed out the floor to remove all the loose debris and then proceeded to restore the floor using a set of diamond encrusted burnishing pads which fit a rotary buffing machine. The burnishing process is designed to grind out dirt in the stone and smooth /polish the floor, you start with a course pad and work your way through the four pad set until you get to the finer polishing pad. This may sounds simple but it does take time to complete.

Marble Tiled Floor Before Cleaning Marble Tiled Floor After Cleaning

Sealing Marble Tiles

Once the floor was polished we applied a couple of coats of Tile Doctor Pro-Seal which is a non-sheen premium sealer recommended for natural stone that provided the natural matte look the client was after and will protect the Marble and keep the floor looking good.

Marble Floor Tiles Restored in Perth

Marble Tiled Pantry Cleaned and Polished at Kinross House Read More »

Victorian Tiled floor in Glasgow after cleaning

Victorian Hallway Tiles Cleaned and Sealed in Glasgow

These Victorian tiles at a residence in Glasgow went through a dramatic change after we restored the colours and appearance. You can see from the photograph below the tiles were dull, stained and there was also paint splashes in various places.

Victorian-Tiled-floor-in-Glasgow-Before-cleaning

Cleaning a Victorian Floor

Firstly the floor was swept out and vacuumed to remove all loose debris; we then covered the entire floor with a strong solution of Tile Doctor Remove and Go combined 50/50 with NanoTech Ultra Clean which was left to dwell on the floor for an hour so it could soak into the tile. This floor did not have a previous sealer applied however the solution helped to break down the ground in dirt in the tiles and also remove the paint splashes.

The dirty solution was then extracted off using a wet vacuum and the floor rinsed with clean water several times to remove any chemical residue. Next we mixed a 50/50 solution of Tile Doctor Pro Clean and NanoTech Ultra Clean which was then scrubbed into the tile using a black scrubbing pad on a rotary machine. This was then removed and floor rinsed again and the floor was cleaned a further three times using a strong solution of Tile Doctor Pro-Clean and extracted with a wet vacuum again followed by a mopping of Neutral Tile Cleaner.

Sealing a Victorian Floor Sealing

Once the floor was dry it was then sealed using four coats of Tile Doctor Seal and Go to achieve the finished result. I recommend Seal and Go for Victorian tiled floors as it leaves a low sheen finish whilst providing excellent stain protection.

Victorian-Tiled-floor-in-Glasgow-after-cleaning
 

Victorian Tiled floor cleaned and sealed in Glasgow

Victorian Hallway Tiles Cleaned and Sealed in Glasgow Read More »

Terrazzo tiled vestibule in Glasgow after cleaning

Terrazzo Tiled Vestibule Cleaned and Polished in Glasgow

This Terrazzo tiled vestibule in Glasgow was completely dull and lacking colour when we arrived, this area probably see’s the most foot traffic in the house so it must of seen a fair amount of wear and abuse over the years.

Terrazzo tiled vestibule in Glasgow before cleaning

Cleaning Terrazzo Tiles

Terrazzo is a very hard surface and needs to be burnished in the same way as you would treat Marble or Travertine, before we could do that thought we needed to remove any loose debris etc. that could scratch the surface during the burnishing process to the first job was to sweep out the area with a brush and vacuum up any loose debris etc.

It was a very tight area so use of our large Bonnet machine was ruled out and we opted instead for a small handheld rotary machine fitted with the diamond encrusted burnishing pads. The burnishing pads come in a set of four and you start with a coarse pad with a little water and work your way through the set moving from a the coarse pads through to the less abrasive pads; this process polishes the stone more and more until you get a smooth finish. After each pad was used the area was thoroughly rinsed with clean water to remove any excess polish before moving onto the next, once we had gone through all four pads the floor was left clean ,smooth, and shiny.

Sealing Terrazzo Tile

Once the burnishing process was completed we proceeded to seal the stone with two coats of Tile Doctor Colour Grow which is a colour enhancing sealer designed to protect the stone whilst lifting the natural colours.

Terrazzo tiled vestibule in Glasgow after cleaning
Although quite intensive due to the space restriction it was quite a small area so it took just less than a day to complete.

Terrazzo Tiled Vestibule restored in Glasgow

Terrazzo Tiled Vestibule Cleaned and Polished in Glasgow Read More »

Travertine Wetroom Glasgow After Cleaning

Travertine Tiled Wet Room Refresh in Glasgow

This Travertine wet room in Glasgow was in a sorry looking state, the tiles had become very dull and there was evidence of mould especially around the silicone.

Travertine Wetroom Glasgow Before Cleaning

Cleaning a Travertine Wet Room

The first job was to cut out all the mouldy silicone around the bottom of the shower cubicle; which had the added advantage of allowing us to clean the adjacent tiles right to the edges. Once the silicone was removed we decanted a dilution of Tile Doctor Pro-Clean into a spray bottle and began to spray it onto the wall tiles. Pro-Clean in an effective alkaline tile cleaner designed for use on stone tiles such as Travertine, spraying the product onto the wall allows it to mix with air making it lighter and easier to stick and soak into a vertical surface. The wall tiles and grout were then scrubbed using a stiff brush until the dirt and mould had been cleaned away.

Polishing Travertine Wall and Floor tiles

Once there tiles were free of dirt and mould we then used a set of six inch diamond encrusted burnishing pads with a hand held rotary machine to polish the travertine. The burnishing pads come in a set of four and you start with a coarse pad with a little water and work your way through the set moving from a the coarse pads through to the less abrasive pads; this process polishes the stone more and more until you get a smooth finish.

Sealing Travertine Tiles

Once the burnishing process was completed we then sealed the stone with two coats of Tile Doctor Colour Grow which is a colour enhancing sealer designed to protect the stone whilst lifting the colours out of the stone. Finally to finish off the job we renewed the silicone seal with Jasmine silicone around the floor and up the corners.

Travertine Wetroom Glasgow After Cleaning
The job took the best part of a day and I think you will agree the results speak for themselves.

Travertine Tiled wet room Cleaned, Polished and Sealed in Glasgow

Travertine Tiled Wet Room Refresh in Glasgow Read More »

victorian tiled floor in Glasgow after

Victorian Tiled Floor Restoration in Glasgow

This Victorian tiled floor was located in the west end of Glasgow, the owner had discovered the tiles under the carpet and wanted to have them restored as an original feature. When we arrived the floor was still covered in carpet glue, cement, and hessian backing from the carpet that had been stuck to the tiles.

victorian-tiled -floor-in-Glasgow-before

Cleaning a Victorian Floor

The first job was to scrape off as much hessian backing and glue as we could with large scrapers and brushed all loose debris away. We then covered the entire floor with a strong solution of Tile Doctor Remove and Go combined with NanoTech Ultra Clean to create an effective coatings remover; this was then left on the floor to dwell for an hour in order to break down and soften the adhesive etc. The floor was then wet extracted and rinsed with clean water several times to remove any excess residue. This allowed us to see what glue was left which was then removed using a steamer. After this we cleaned the floor three times using Pro-Clean and a black buffing pad on a rotary bonnet machine to clean the floor; again all the dirty water was wet extracted with a wet vacuum and the floor neutralised with more water to ensure no chemicals remained on the floor prior to sealing.

Sealing a Victorian Floor Sealing

The floor was left to dry overnight and we came back the next day to seal it with four coats of Tile Doctor Seal and Go which is an ideal sealer for Victorian tiled floors as it leaves a low sheen finish whilst providing excellent stain protection. You have to wait for each coat to dry before moving on to the next so it did take a while.

victorian-tiled -floor-in-Glasgow-after
This was a tough job but certainly well worth the effort as the floor has been completely transformed and now looks fantastic.

Victorian Tiled floor restored in West Glasow

Victorian Tiled Floor Restoration in Glasgow Read More »

=================================

Glasgow Tile Doctor

================================= Read More »

Scroll to Top